


Fabric woven basket
This is a tutorial of how to make this really useful little woven basket either for yourself or it would make a lovely gift……especially if you filled it with goodies.
I used strips of fabric that were left from other projects. The good thing is you can change the size to Suit yourself. Also the fabric needs to be fairly heavyweight so if you are using lightweight cotton you will need to pad it out a bit to allow it to ‘stand’ up. Either use wadding or I’m all for using up what you have in hand rather than buying fabrics for all new jobs, so if you have some …not so pretty, say curtain fabric, you can use it for the padding out and face it with your thin pretty fabric? Always look at what you have to use up before investing in new fabric.
This particular basket measures 15 high x 20.5cm diameter when completed but as I said previously you can make it taller or as wide as you like.
Start by getting the strips together. You will need six 6 x 51cm these will be the the strips that run around the diameter. You will also need ten contrasting strips 6 x 20cm and two 21cm circles, one of each colour. Plus two pieces 5 x 51cm for the top and bottom rims.

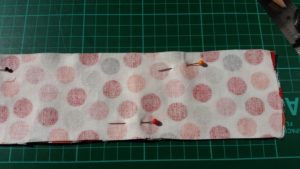
Using the longer length strips and right sides together, match and pin

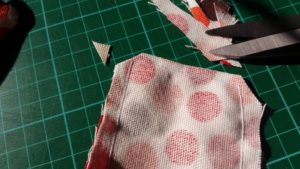
Sew up three sides, leaving just one of the shorter sides open in order to turn it the right side, but snip off the corners to alleviate the bulk.
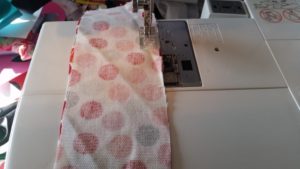
Fold the other shorter strips in half, right sides together and sew up the same way. Then turn all the strips the right way round.
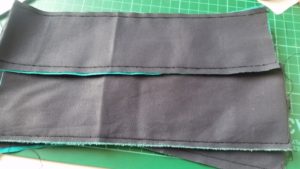

You should press the strips at this stage so that they are nice and flat but I omitted this stage (because I hate ironing). You don’t have to do this but I think it’s neater if you sew around the outer edge. I have used contrasting cotton throughout to illustrate what I have done.


Get your pin cushion ready because you are going to use quite a lot of pins and lay out the longest strips one above the other like shown.
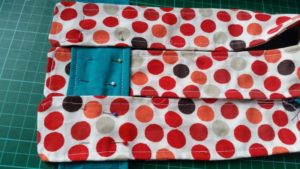

Start weaving the contrasting strips up and over making sure they are slightly higher but level with each other and pin in place.


Keep adding the contrasting strips and pinning each square in place, …..you get the idea. Make sure they are very close together, you don’t want gaps but you don’t want it pulled too tightly together either. Double pinning each square will help keep everything where it should be.


When you are happy that they are all in position, pin the bottom edge on with right sides together as shown then sew in place.

Now that everything is held on one edge, it’s time to bring the sides together to make the circle. You will have one neat end and one open end.


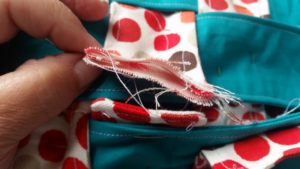
To make this a nice neat almost invisible join, fold in all the rough edges and slide in the sewn end and pin in place, then sew together. Do this on all three lines.


Now get your 2 circles and right sides together pin and sew nearly all the way around leaving just a little opening to turn it the right way. If you want it to be a solid base then obviously you won’t be able to do it this way, it will have to be done right sides up with your stiffener sandwiched between the 2 circles.


Then sew all around the edge, closing the hole at the same time.


Now you have to attach the base by firstly pinning it in place, wrapping the piece that you’ve just sewn in place and tucking in the raw edges.

When you are happy that your base is in correctly then go ahead a sew it in position. Take your time over this, you want to make sure that it sits nice and flat when you turn it over.


You can remove all the pins out of the bottom and middle lines because they are not going to move anywhere now. Then fold over all the loose ends into the basket.


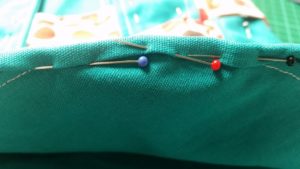
Making sure all the folded pieces are level, pin and sew all around the rim. When you are sure each piece is level and correct it easier to turn the basket inside out and snip off the excess fabric off each strip. Now you can remove all of the pins.
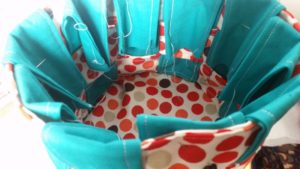

Place the top strip in place with right side facing in and pin it so it forms a nice straight line across the squares on the top row.


Still with the basket inside out, you need to sew this in place, the same way you would if you were using bias binding, similar to what you did at the base. Then pull the fabric over as shown in the photo.


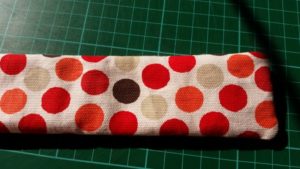
Tuck the raw edge under and pin again making sure you finish it above the squares so that its nice and neat. Sew around the top and then turn it the right way round

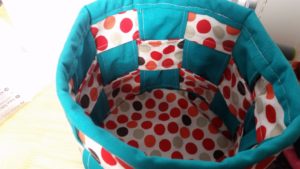
And there you have it!
You can make it with handles if you prefer by using the same width strips as in the basket and tucking them under the top row before the final stitching. And don’t forget, you can make it taller or wider to suit the purpose and if you have loads of narrower scrap lengths….well the possibilities are endless! ?
